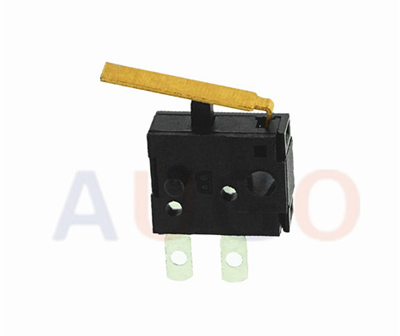
Introduction to microswitches
The micro switch has a small contact interval and a snap action mechanism. A contact mechanism that performs switching action with a specified stroke and a specified force. Cover with casing. There is a switch on the outside that drives the lever. Because the contact distance of the switch is relatively small. Hence the name micro switch. Also called sensitive switch. The electrical text symbol is: SM.
There are many types of micro switches. There are hundreds of internal structures. According to the volume, there are ordinary, small and ultra-small; according to the protection performance. There are waterproof type, dustproof type, explosion-proof type; according to the breaking form. There are single type, double type and multi-link type. There is also a strong disconnecting micro switch (when the reed of the switch does not work. The external force can also make the switch disconnected); it is divided according to the breaking capacity. There are ordinary type, DC type, micro-current type, high-current type. According to the use environment. There are ordinary type, high temperature resistant type (250℃), super high temperature resistant ceramic type (400℃).
Micro switches are generally based on unassisted pressing accessories as the basic type. And derive small stroke type, large stroke type. Different auxiliary pressing accessories can be added as needed. According to the different pressing auxiliary switches added, it can be divided into button type, reed roller type, lever roller type, short boom type, long boom type and so on.
Micro switches are used for automatic control and safety protection in equipment that requires frequent switching of circuits. Widely used in electronic equipment, instrumentation, mining, power systems, household appliances, electrical equipment. As well as aerospace, aviation, ships, missiles, tanks and other military fields. It has been widely used in the above fields. The switch is small. But it plays an irreplaceable role.

How microswitches work
The external mechanical force acts on the action reed through transmission elements (press pins, buttons, levers, rollers, etc.). Instantaneous action occurs when the action reed is displaced to a critical point. The moving contact and the fixed contact at the end of the action reed are quickly connected or disconnected.
When the force on the transmission element is removed. The action reed produces the opposite action force. When the reverse stroke of the transmission element reaches the critical point of action of the reed. The reverse action is completed instantaneously. The contact distance of the micro switch is short, and the action stroke is short, and the on-off is fast according to the power. The action speed of the moving contact has nothing to do with the action speed of the transmission element.
Micro switches have tiny contact spacing and snap action mechanisms. A contact mechanism that switches on and off with a specified stroke and force. covered by the shell. It has a drive on the outside. And the shape is small. Micro switches are composed of five major categories of components.
Micro switches are used in many ways. Such as computer mouse, car mouse, automotive electronic products, communication equipment, military products. Test instruments, gas water heaters, gas stoves, small household appliances, microwave ovens, rice cookers, floating ball equipment, medical equipment, building automation, power tools and general electrical and radio equipment, 24-hour timers, etc.
How to remove the micro switch?
The micro switch has a small contact interval and a snap action mechanism. A contact mechanism that performs switching action with a specified stroke and a specified force. Cover with casing. There is a switch on the outside that drives the lever. Because the contact distance of the switch is relatively small. Hence the name micro switch. Also called sensitive switch.
Use a soldering iron and tin wire. Connect all three feet behind the microswitch. When heated again. Those tins can then be heated at the same time. achieve the purpose of melting together. After connecting the tin. Pause for a while. Then use gold tweezers to hold the top of the microswitch. Heat the solder joints of those three feet on the back again. The tip can be moved laterally slightly. After the tin on all three feet has melted. Bend slightly towards the front of the microswitch. Raise the three feet behind the micro switch by about 0.3MM. But don't push too hard. Then quickly and sequentially heat the two solder joints in front of the microswitch repeatedly. After the solder joints have melted. Towards the back of the microswitch. Bend a little bit. Make the two feet in front of the microswitch just disengage from the pads. strength. Be light. Finally heat the three foot solder joints at the back. Bend forward some angle. The micro switch can be removed smoothly.


